Binoculars are one of the most useful pieces of outdoor kit you can buy, and one of the easiest to misjudge. Two barrels and a focus wheel look simple, but the viewing experience depends on a handful of fit adjustments that many people skip. The result is predictable: “These are blurry,” “The edges look weird,” or “I get a headache,” even when the optics are perfectly fine.
This guide is built around the same routine many specialty retailers and field users rely on: set the binoculars to your eyes first, then test performance in a way that matches real use (panning, backlight, low light, and long sessions). It takes about two minutes to set up a binocular correctly and about three minutes to evaluate whether it is a good sample and a good match for your needs.
1) Fit the binoculars to your eyes before you judge the optics
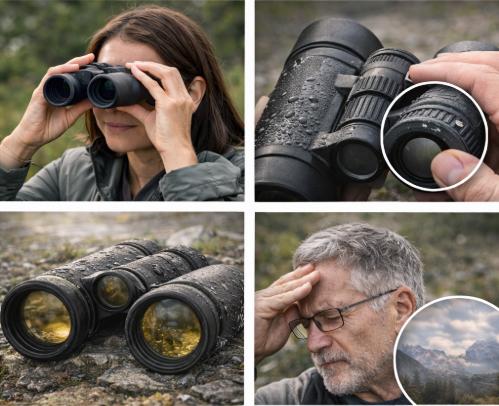
Eyecups set your eye distance from the eyepiece. When they’re wrong, you’ll see black crescent shadows (“kidney beans”), a reduced field of view, or an image that comes and goes as you move your head.
- No glasses: extend the eyecups fully.
- With glasses: twist them in (or down to a lower click) so your glasses can get close enough to see the full field.
- Aim for one bright circle with minimal blackout as you scan around the view.

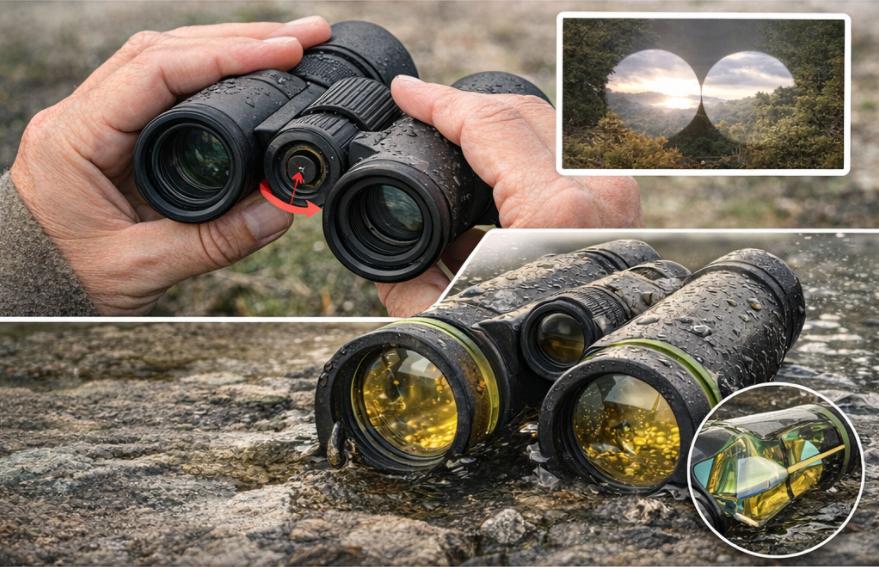
Next, set interpupillary distance (IPD). Adjust the hinge until the two circular images merge into one perfect circle. If you see a figure-8, your IPD is off. An IPD mismatch can also make good binoculars feel “stressful” because your eyes are forced to work to merge the image.
Finally, consider eye relief. If you wear glasses, effective eye relief is what matters – whether you can see the full circular field comfortably with glasses on, without pressing your frames into the eyecups.

2) Focus correctly: center wheel + diopter (in the right order)
Choose a high-contrast target at distance: street sign text, roof tiles, tree bark, or a license plate viewed safely from an appropriate distance. Avoid hot pavement shimmer or long-distance heat haze, which can mimic softness in any optics.
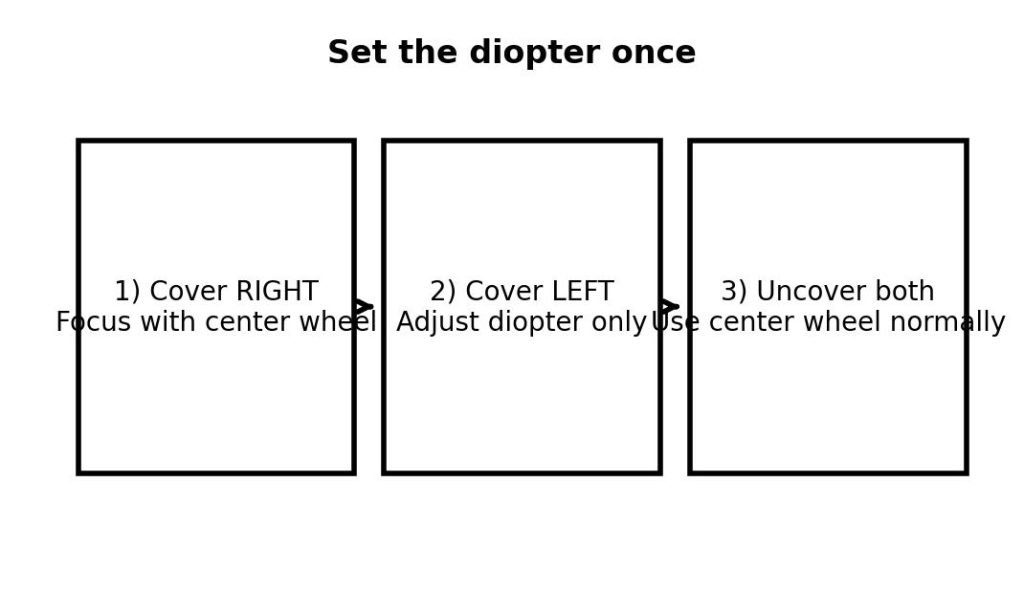
Diopter setup (do this once for the main user):
- Cover the right objective (or close your right eye).
- Using the center focus wheel, focus until the target is razor sharp for your left eye.
- Cover the left objective (or close your left eye).
- Without touching the center wheel, rotate the diopter ring until the right eye is sharp.
- Uncover both sides. From now on, use the center wheel for everyday focusing.
Common mistakes (and easy fixes): don’t treat the diopter like a second focus control; set it on fine, high-contrast detail; and if your binocular has a locking diopter, lock it after setup so it can’t drift in a bag.
3) The 60-second acceptance check (fast, reliable, repeatable)
Once eyecups, IPD, and diopter are set, run this quick pass on the exact unit you’ll take home:
- Snap-to-focus: the image should “lock” into focus cleanly on small text or fine texture. Mushy focus often points to contrast, stray light, or mechanical backlash.
- Comfort hold: keep the view for 30-60 seconds. Persistent eye strain after correct setup can indicate alignment (collimation) issues.
- Left/right match: compare each barrel by closing one eye at a time. Large differences in sharpness, brightness, or color tint suggest sample inconsistency.
4) Optical tests that predict real field performance
These checks tell you how binoculars behave in real use: panning, backlit scenes, low light, and long sessions.
Exit pupil is a quick indicator of low-light comfort and how forgiving eye placement will feel. Exit pupil equals objective diameter divided by magnification (for example, 8×42 = 42/8 = 5.25 mm). Larger exit pupils tend to look brighter at dusk and feel easier to hold steady.
Usable field matters more than the field-of-view number on a spec sheet. Focus in the center, then move your eyes toward the edge. Some edge softening is normal; what you’re looking for is how much of the circle stays clear enough for tracking.
Close focus and depth of field affect how often you need to refocus. If you care about near subjects (butterflies, flowers, museum details, feeder birding), verify the close-focus distance in practice.
Glare, haze, and ghosting control often separates average optics from excellent optics. Place a bright source just outside the field (never stare into the sun). Better binoculars keep contrast; weaker ones show a milky veil or internal reflections.

5) Mechanical checks that matter after the first week
Optics can be excellent, but if the mechanics drift, your experience won’t. Check focus wheel smoothness and backlash, diopter stability, and hinge tension. For wet climates and temperature swings, sealing and internal gas purging (nitrogen or argon) help prevent internal fogging.
6) Under-the-hood choices that change what you see
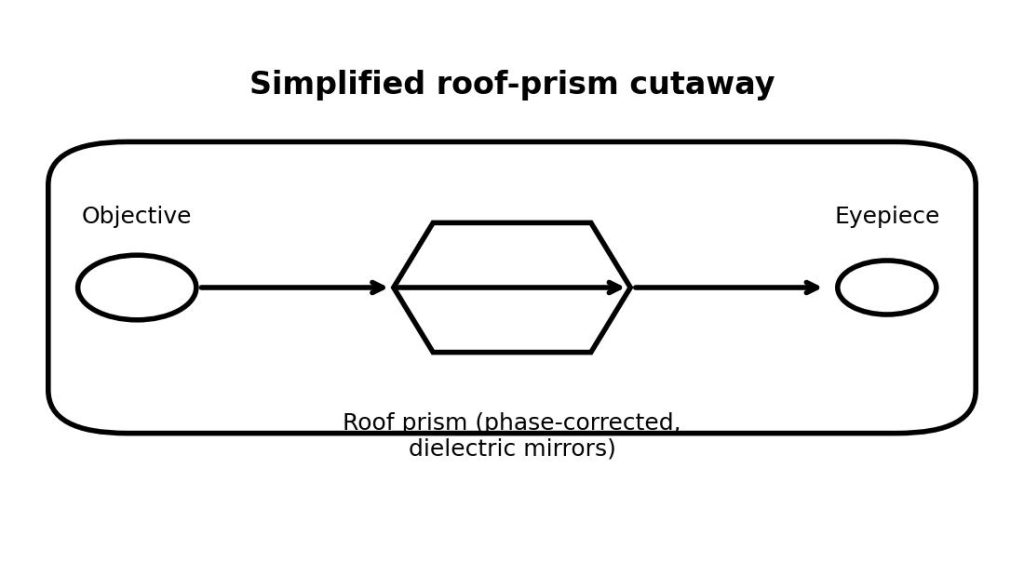
Prism and coating choices influence contrast, color neutrality, and flare resistance. Roof prism binoculars are slim and pack well; Porros are wider but can deliver strong depth perception and value. For roof prism designs, phase correction coatings are critical for contrast, and higher-grade mirror coatings can improve brightness and consistency. In side-by-side comparisons, stray-light control often reveals coating quality faster than a spec sheet.
7) A 3-minute comparison routine (store or delivery check)
Run this sequence in consistent lighting:
- Set eyecups, IPD, and diopter.
- Check center sharpness on small distant text.
- Look to the edge for usable field.
- Check branches against bright sky for chromatic aberration.
- Put a bright source just outside the field to assess glare.
- Pan across straight lines to gauge distortion comfort.
- Finish with a 60-second comfort hold.
If a binocular passes these steps, it will usually perform well where it counts.
8) Prioritize by your main use case
Different activities stress different parts of the optical and mechanical package:
- Birding and wildlife: comfort, usable field, close focus, micro-contrast, and glare control in backlit conditions.
- Travel and sightseeing: wide usable field, comfortable panning, compact weight, and a focus wheel that’s quick but controllable.
- Sports and concerts: wide field, fast target acquisition, good indoor low-light behavior, and smooth focusing.
- Marine and wet environments: sealing, fogproofing, and glare control; salt spray and reflections punish weak coatings.
- Low-light observation: larger exit pupils, strong contrast, and clean stray-light control.
9) Troubleshooting the common complaints
- “I see black shadows.” Usually eyecups or eye position. Adjust eyecup height and center your eyes behind the eyepieces.
- “It’s sharp with one eye but not both.” Reset the diopter, then check whether the diopter ring is drifting.
- “I can’t get it sharp anywhere.” Clean exterior lenses and retest on a high-contrast target in stable air. If it still won’t focus, suspect a defect or misalignment.
- “I get a headache after a minute.” Re-check IPD and diopter. If discomfort persists, the binocular may be out of collimation.
The takeaway
A good binocular should disappear in use: quick to focus, easy on the eyes, and stable in your hands. Set eyecups, IPD, and diopter correctly, then test the traits that predict real performance: usable field, contrast, glare control, alignment comfort, and mechanical stability. Do that, and you’ll spend less time second-guessing specs and more time seeing what you went out to see.