Most buyers start with magnification because it looks like the whole story: 8× “brings things 8× closer,” 10× “brings things 10× closer.”
But in real use—walking a trail, tracking birds, scanning a skyline—magnification is the easiest spec to read and the least reliable predictor of comfort.
That’s why two binoculars with the same magnification can feel radically different: one feels open, easy, and forgiving; the other feels like a narrow tunnel that blacks out unless you hold it just right.
The difference is not magic. It’s geometry—and three parameters that multiply together in your hands: field of view (FOV), eye relief, and exit pupil. Under the hood, the prism aperture is the silent fourth lever that decides whether the promised FOV is actually delivered.
In this article, you’ll learn:
- What “usable field of view” means (and why the spec-sheet FOV number is only the starting point).
- How FOV, eye relief, and exit pupil jointly determine comfort, “blackouts,” and glasses compatibility.
- How prism aperture and internal design can clip the view even when the printed specs look identical.
- A practical, scenario-based checklist for travel, birding, and everyday carry.
Why magnification alone fails
Magnification mainly changes two things: how large the subject looks, and how hard it is to keep the image steady. It does not directly tell you how wide the scene feels, how fast you can acquire a target, or whether you can see the full image with glasses.
In fact, higher magnification often reduces comfort unless the binocular’s other design choices compensate—because higher magnification typically narrows the real FOV and shrinks the exit pupil.
So instead of asking “8× or 10×?”, start with a better question:
How much of the scene can you actually see, comfortably, in the way you will really use the binocular?
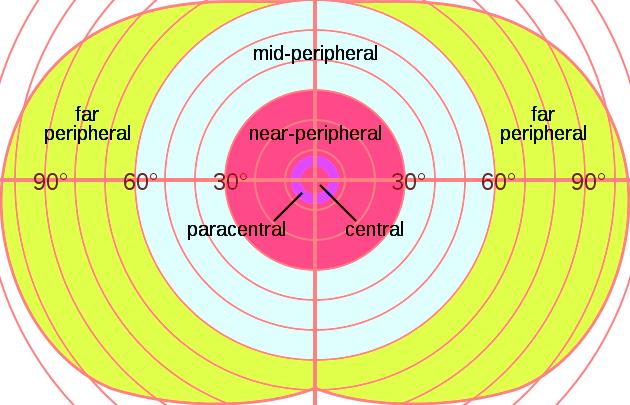
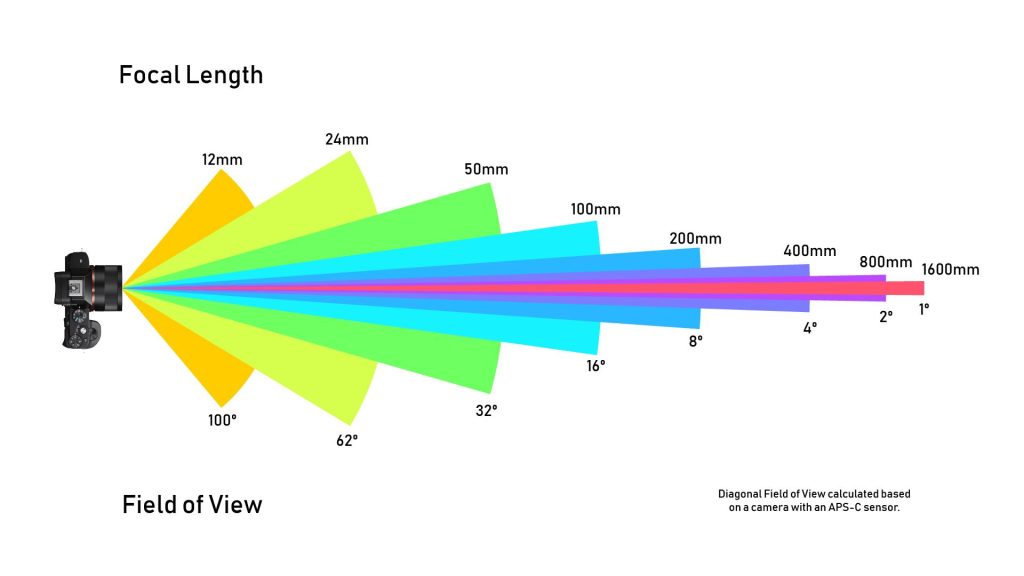
Start with the geometry: what FOV really is
Field of view is an angle. It describes how wide a slice of the world the binocular shows at a fixed distance.
Manufacturers usually state real FOV in degrees (°) or as a width at a reference distance (for example, meters at 1,000 meters or feet at 1,000 yards). These are the same thing in different units.
Quick conversions (good enough for shopping):
- Degrees ≈ (field width in meters at 1,000 m) ÷ 17.45
- Field width at 1,000 m ≈ degrees × 17.45 meters
- Field width at 1,000 yd ≈ degrees × 52.36 feet
Real FOV vs. apparent FOV (why “wide-angle” feels wide)
Real FOV describes the slice of the world. Apparent FOV describes how wide that slice looks to your eyes through the eyepiece—the “window” feeling.
A simple rule of thumb is: apparent FOV ≈ magnification × real FOV. More accurate standards use a tangent formula for wide angles, but the rule of thumb is enough to compare products.
Two binoculars can share the same magnification but have different real FOV. Or they can share the same real FOV but feel different if the eyepiece design changes the apparent FOV.
Your brain is used to a huge natural field of view. Through binoculars you’re always looking through a much smaller, circular window—so every degree matters.
“Usable field of view”: FOV × eye relief × exit pupil
The FOV printed on a spec sheet assumes you can place your eye at the correct position behind the eyepiece. In practice, the full circle is only visible when your eyes are in the binocular’s “eye box.”
Usable field of view is the portion of the stated FOV you can reliably see without fighting black crescents, tunnel vision, or partial cutoff—especially when walking, panning, or wearing glasses.
You can think of it like this:
- FOV sets the maximum width available on paper.
- Eye relief determines whether your eye can physically reach the correct distance (critical with glasses).
- Exit pupil determines how forgiving the eye box is—how sensitive the view is to small positioning errors.
Eye relief: the glasses test (and why the number can lie)
Eye relief is measured in millimeters. It’s the distance from the last surface of the eyepiece to the point where your eye sees the full field stop.
If you wear glasses, your eye sits farther away because the glasses add distance. If the binocular’s eye relief is too short, you physically cannot get close enough to see the full field—so your usable FOV shrinks even if the spec-sheet FOV looks great.
Practical thresholds (typical, not absolute):
- ≥ 17 mm: usually comfortable for most eyeglass wearers.
- 15–16 mm: often workable, depending on frame thickness and eyecup design.
- 13–14 mm: borderline; many users lose part of the field.
- ≤ 12 mm: usually not glasses-friendly.
One complication: different brands measure from different reference points. Two binoculars both labeled “16 mm eye relief” may not deliver the same effective eye relief once you account for recessed lenses, eyecup shape, and the thickness of the eyecup rim.
A quick in-hand check is simple: with eyecups fully down (or collapsed), can you see a full, sharp circle without pushing your frames into the rubber?
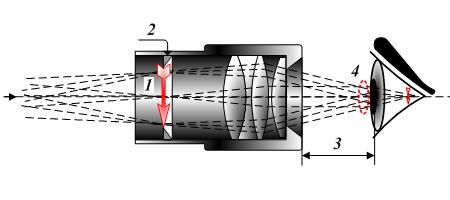
Exit pupil: why some binoculars feel “finicky”
Exit pupil is the diameter of the beam of light exiting the eyepiece. It’s calculated directly from the main specs:
Exit pupil (mm) = objective diameter (mm) ÷ magnification
Bigger exit pupils do two things for you:
- They are more forgiving of eye placement (larger eye box).
- They provide more potential brightness in dim conditions—up to the limit of your own eye pupil.
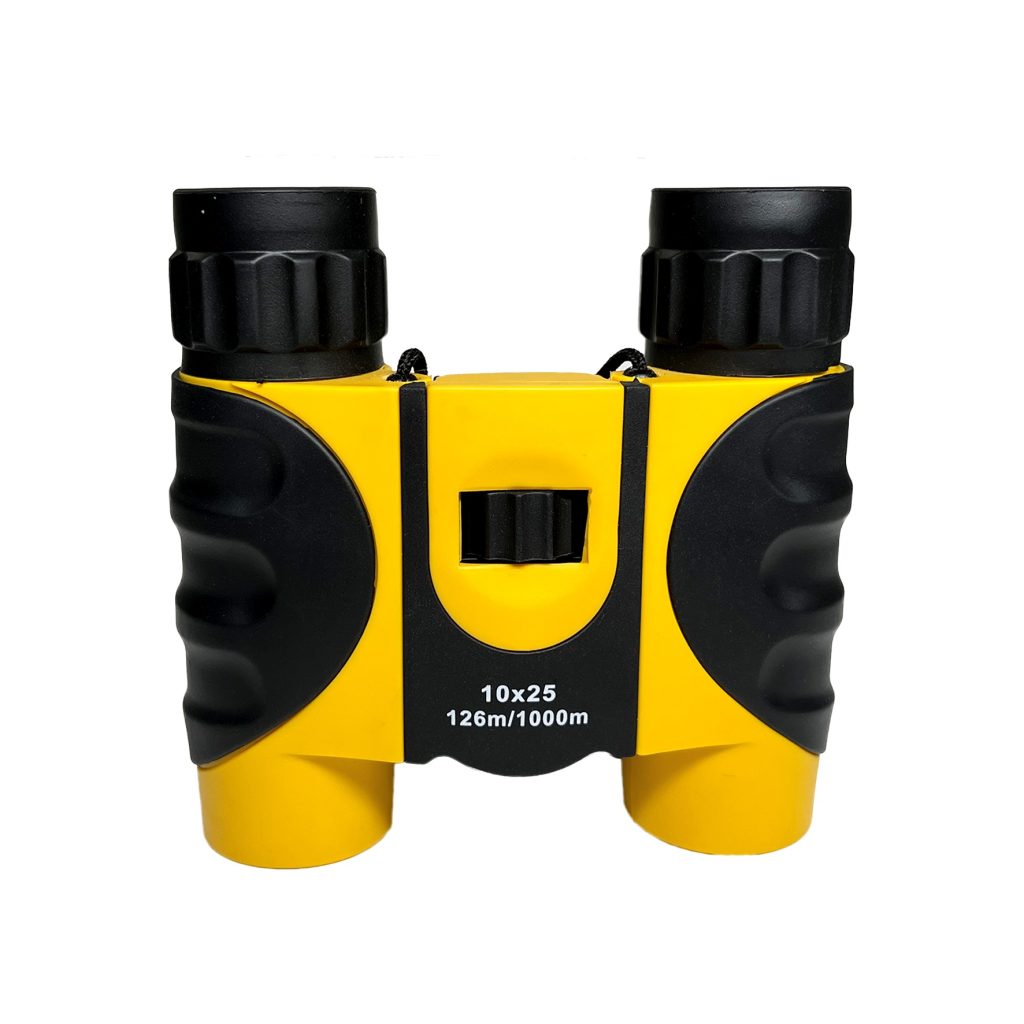
This is why many users describe compact 10×25 binoculars as harder to use than 8×25: the exit pupil shrinks from 3.1 mm to 2.5 mm. That sounds small on paper, but it often shows up as more blackouts and more time spent “finding the image.”
Quick reference: exit pupil by common formats
| Format | Exit pupil | Usability feel | Typical use |
| 8×21 | 2.6 mm | Very portable; more sensitive to blackouts | Bright daylight travel, backup pair |
| 10×25 | 2.5 mm | More reach; most finicky of these formats | Daytime detail when you can brace |
| 8×25 | 3.1 mm | Best “pocket” compromise | Travel, city viewing, casual nature |
| 8×32 | 4.0 mm | Easy eye placement; wide, relaxed view | All‑day carry, birding in mixed light |
| 10×42 | 4.2 mm | Reach + forgiving eye box; heavier | Birding, open landscapes, low light |
| 7×42 | 6.0 mm | Very forgiving; excellent depth of field | Low light, scanning, fast acquisition |
Important nuance: a large exit pupil doesn’t automatically guarantee comfort if the eyecup/eye‑relief geometry is wrong for your face. But all else equal, larger exit pupils are easier to use and more tolerant of motion.
The silent limiter: prism aperture and internal clipping
Here’s the part most consumers never see: wide views need space inside the binocular. If the prism system or internal apertures are undersized, they can clip the off‑axis rays.
When that happens, you may still get a center image that looks sharp, but the edges lose brightness (vignetting) or the effective field stop becomes smaller than advertised—reducing usable FOV.
This is why two models can share the same “8×32” headline specs but feel different:
- One uses larger prisms or a more generous internal clear aperture, preserving edge illumination.
- Another saves cost/weight with smaller prisms, which can narrow the effective field or darken the edge.
- Wide‑angle eyepieces often require larger eye lenses and larger prism apertures—so “wide FOV” tends to correlate with size, weight, and price.
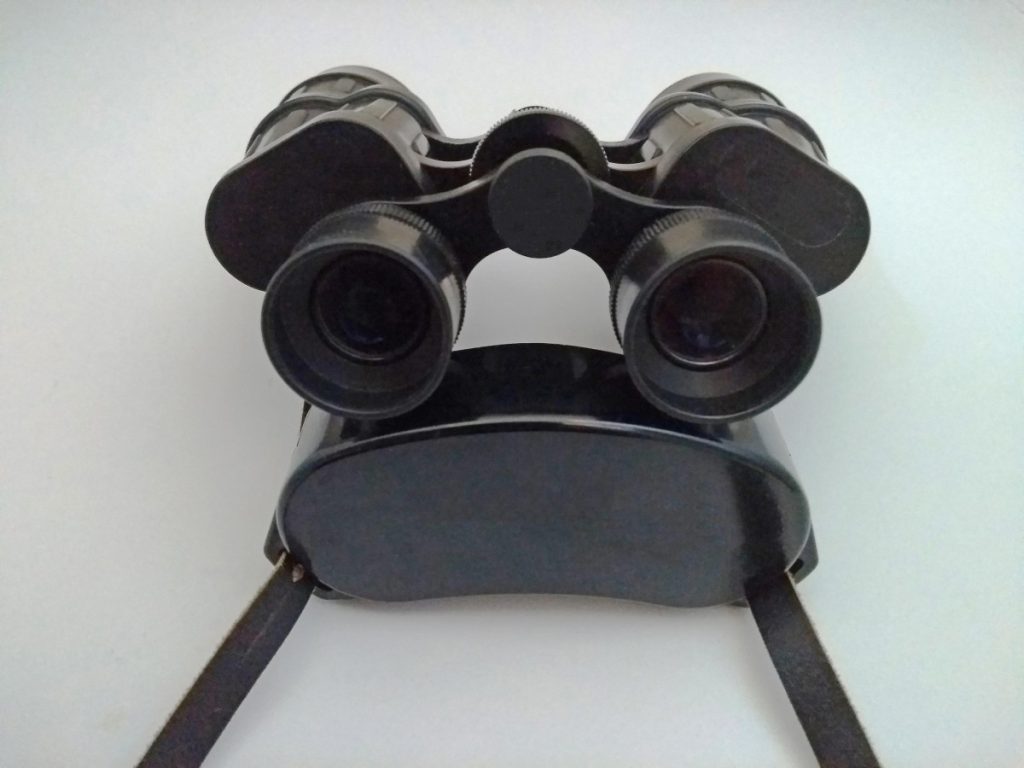
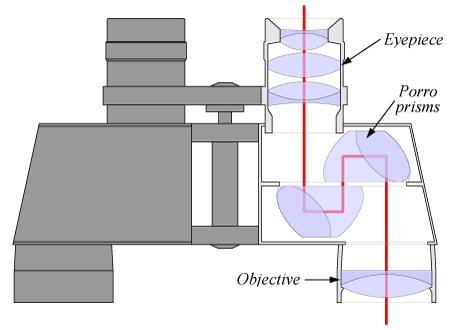
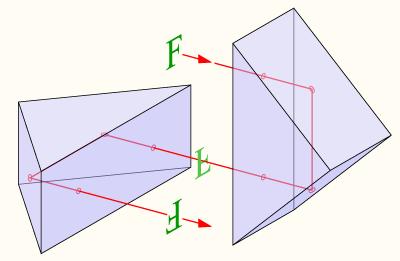
Porro vs. roof: different folding, different constraints
Porro prisms and roof prisms both flip and fold the image, but they do it with different geometry. That geometry affects how easily a design can keep large clear apertures while staying compact.
 Porro-style folding (diagram).
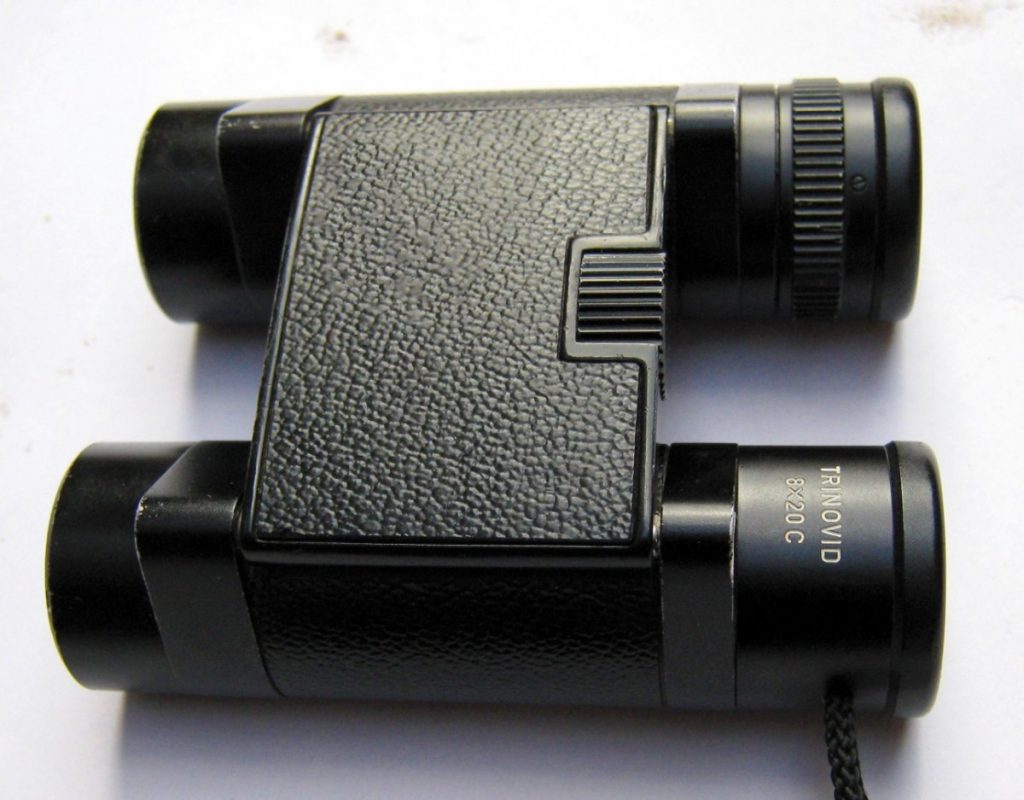
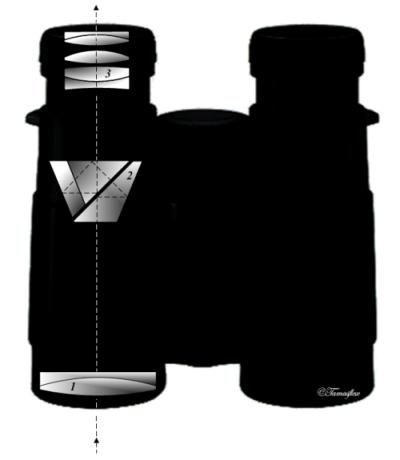
 Roof-prism folding (Schmidt–Pechan example).
In compact binoculars and rangefinding binoculars, designers often fight for millimeters of internal clearance. More folding (or additional optical modules) can force smaller prisms, which is one reason some compact models show more edge darkening.
A practical checklist: how to predict usable FOV before you buy
You don’t need lab equipment. You need a structured way to read specs and a couple of quick checks.
Step 1 — Set the FOV target by task
If you’re scanning or tracking moving subjects (birding, wildlife, sports), wider real FOV reduces search time and keeps the subject in-frame.
- Fast tracking / birding: prioritize wider real FOV at your chosen magnification (often ~6.5°–8° at 8×).
- General travel / city viewing: moderate-to-wide FOV helps you “find” landmarks quickly.
- Detail inspection (static subjects, tripod/brace): narrower FOV may be acceptable if other specs are strong.
Step 2 — Glasses? Make eye relief non-negotiable
If you wear glasses, treat eye relief as a hard constraint. A wide-FOV binocular with short eye relief can feel narrower than a modest-FOV binocular with long eye relief, because you can’t see the full circle.
Step 3 — Use exit pupil to predict forgiveness
For handheld use, exit pupil is the best quick proxy for how “easy” a binocular feels.
- ≤ 2.5 mm: can be sharp and compact, but expects precise eye placement.
- 3–4 mm: the sweet spot for travel and general use.
- ≥ 4 mm: forgiving eye box and better comfort in dim conditions (with the tradeoff of size/weight).
Step 4 — Add the hidden check: edge illumination
Even if the stated FOV is wide, internal clipping can reduce the useful part of that width.
- Look at a bright, uniform surface (overcast sky or a light wall). Do the edges dim strongly?
- Pan across a straight line (building edge, horizon). Excessive distortion can be normal, but sudden shading changes often suggest clipping.
- If possible, compare two models at the same magnification: the one that stays evenly bright to the edge typically feels more spacious and premium.
Troubleshooting: when the view doesn’t match the spec
If you hear these complaints from users, they usually map to the three parameters directly:
“I see black crescents / the image blacks out.”
- Most often: eye position is not in the eye box. Adjust eyecup height first.
- Small exit pupils (compact 10×25, 12×, etc.) are inherently less forgiving—brace the binocular and slow down your panning.
- With long eye relief, too-short eyecup extension can cause “kidney beaning.” Extend the eyecups one click at a time until the blackouts stop.
“It feels like I’m looking through a tunnel.”
- Real FOV may be narrow—but glasses and short eye relief can make it feel even narrower.
- Check whether you can see the full circular field stop. If not, you’re losing usable FOV.
- Compare apparent FOV: some eyepieces simply give a narrower “window” even at similar real FOV.
“I get eye strain or headaches quickly.”
- Re-check interpupillary distance (IPD): the two circles should merge into one perfect circle.
- Reset diopter and refocus: mismatched focus between eyes forces your vision to work harder.
- If discomfort persists across users, miscollimation is possible (a quality issue).

Putting it into product selection (travel, birding, everyday carry)
Once you frame the decision around usable FOV, the “right” choice often becomes clearer than magnification-first shopping.
Travel & everyday carry: prioritize forgiveness in a compact package
- Best balance: 8×25 or 8×28 with decent eye relief and a real FOV that feels open.
- If you wear glasses: look for long eye relief and usable twist-up eyecups; otherwise you may lose the wide view you paid for.
- Be cautious with 10×25 as a first travel optic: the smaller exit pupil makes it less forgiving while walking.
Birding & nature: usable FOV beats raw reach
- All‑day carry: 8×32 is often the comfort sweet spot (exit pupil ≈ 4 mm, typically wider feel).
- More reach: 10×42 can work well if weight is acceptable and the FOV stays wide enough for tracking.
- If you struggle with blackouts: favor larger exit pupils and better eyecup adjustment over “more power.”
Low light scanning (dusk, forest edges): exit pupil becomes decisive
- Look at 7×42 or 8×42 style formats when low light and acquisition matter more than compact size.
- In dim scenes, a forgiving eye box reduces fatigue and helps you keep the subject centered.
What budget tiers typically change ($50–$100 vs. $100–$300)
Price does not guarantee comfort, but it often buys the things that make usable FOV easier to achieve consistently.
$50–$100: focus on the three parameters + basic mechanics
- Prioritize adequate eye relief (especially for glasses) and a not-too-small exit pupil for your use case.
- Expect simpler eyepieces: the stated FOV may be narrower, and edge sharpness/illumination can fall off sooner.
- Mechanical variance can be higher—check hinge tension, focus smoothness, and whether the binocular stays comfortable after a few minutes.
$100–$300: where wide, comfortable views become easier to deliver
- You’re more likely to find wide‑angle eyepieces that still keep eye relief usable (a hard design combo).
- Better internal baffling/coatings can reduce flare and keep contrast—making the edges feel cleaner and less “washed out.”
- Stronger mechanical control improves collimation stability, which directly impacts fatigue and perceived comfort.
If your brand message is “professional experience at accessible price,” usable FOV is a strong organizing principle: it connects the spec sheet to what users actually feel in the first 30 seconds.
Conclusion: a 30‑second way to choose the right binocular
When two binoculars share the same magnification, the better experience usually comes from the one that delivers more usable field—not just more theoretical reach.
Use this quick decision order:
- Pick a magnification you can hold steady (often 8× for walking use).
- Choose the widest real FOV you can get in your size/weight target.
- Lock in eye relief if you wear glasses (aim ≥ 15–17 mm).
- Prefer a larger exit pupil for comfort (≈ 3–4 mm for travel; ≥ 4 mm for relaxed viewing).
- If possible, do an edge‑illumination check to spot internal clipping.
That’s the core idea: usable FOV is not a single spec—it’s the intersection of optical geometry and human factors. Get that intersection right, and the binocular will feel “easy,” even to first‑time users.