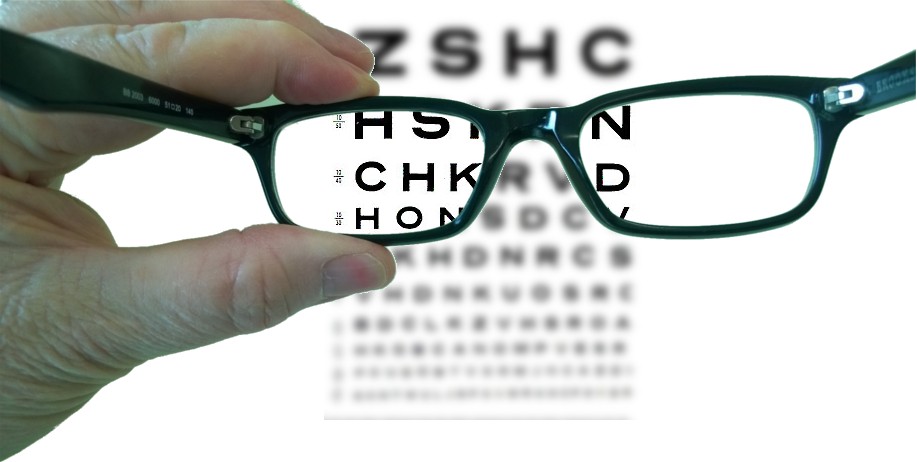
If you only focus on “8×/10× magnification” and field of view (FOV) on the spec sheet, you may notice something confusing: two binoculars with the same 8× magnification can feel very different. One may immediately show a full, clean view with clear edges, while another feels like looking through a narrow tube—and this difference is even more obvious for people who wear glasses.
The issue is usually not the magnification. Instead, it is the combination of FOV, exit pupil, eye relief, and the prism clear aperture that determines the “usable FOV.”
How FOV × Exit Pupil × Eye Relief Determine “Usable Field of View” and Eyeglass Compatibility?
Key Points in 3 Minutes
- “Usable field of view” = the complete image you can stably see in real viewing posture (including the edges), not just the stated TFOV / linear field of view on the spec sheet.
- Eyeglass compatibility is not simply “the longer the eye relief, the better.”
Effective eye relief = stated eye relief − (eyecup height / retraction + distance from glasses to the eye). - Exit pupil size determines the tolerance of the eye box, while the prism clear aperture and edge illumination determine whether the edges remain bright.
- With the same magnification, achieving “full field of view + no blackouts + forgiving eye position” requires several things at once: sufficient effective eye relief, a large enough exit pupil, and an optical path that is not clipped by the prism or field stops.
Clarifying the Terms: What TFOV, AFOV, Exit Pupil, Eye Relief, and Prism Aperture Actually Mean
To avoid confusion where the same term means different things to different people, let’s first align on five key parameters:
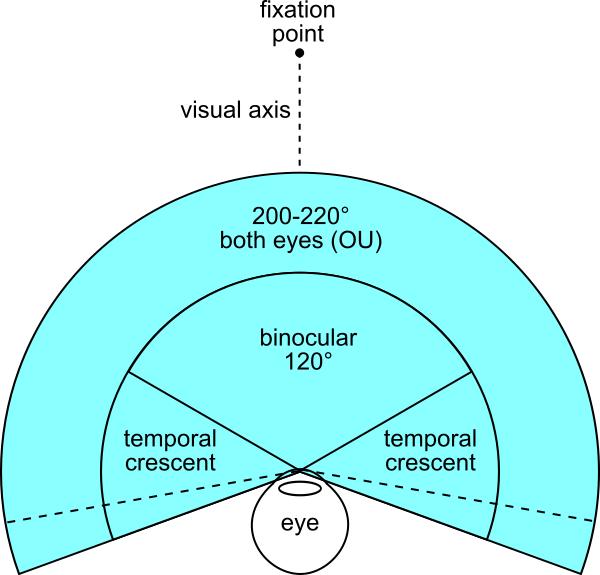
- TFOV (True Field of View): The actual angular area you can see, usually expressed in degrees (°) or converted to linear field of view at 1000 m (m/1000 m).
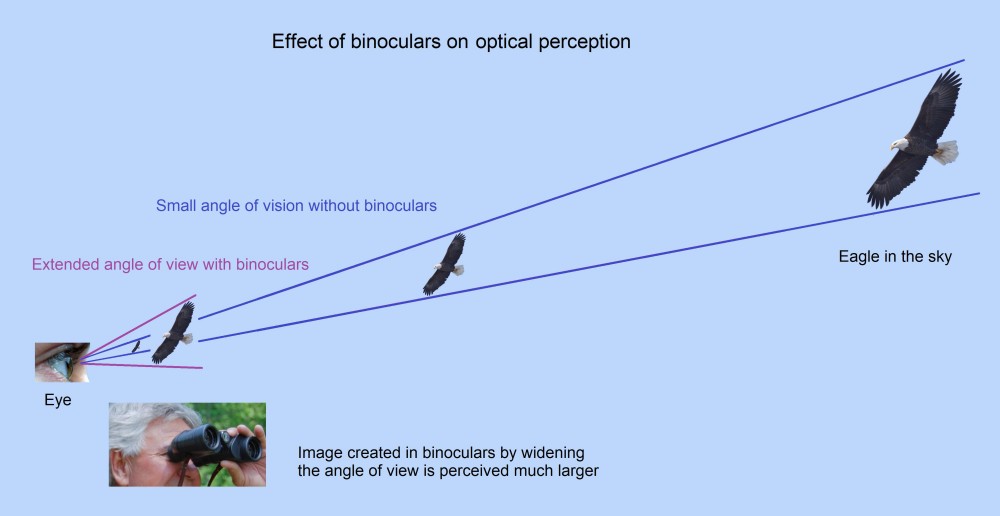
- AFOV (Apparent Field of View): How wide the image feels subjectively to the viewer. A common approximation is:
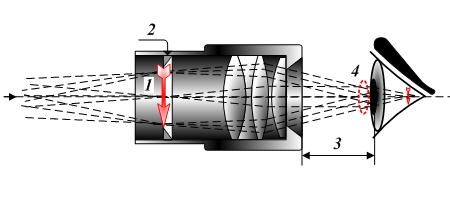
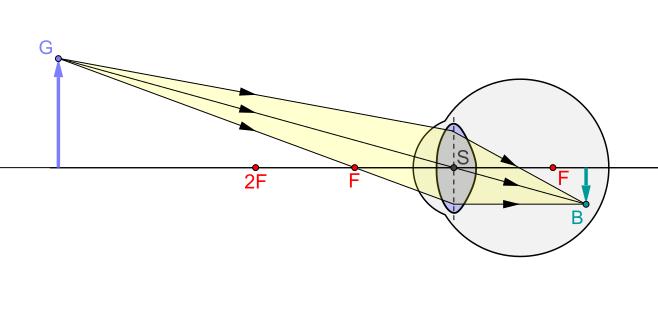
AFOV ≈ Magnification × TFOV (a small-angle approximation used for quick comparisons). - Exit Pupil: The bright circular image formed by the eyepiece behind the binocular.
Formula: Exit pupil diameter (D_exit) = Objective diameter (D_obj) / Magnification (M). - Eye Relief: The distance from the last surface of the eyepiece to the exit pupil. It determines where your eye needs to be positioned.
- Prism Clear Aperture: The effective clear opening inside the prism that light can pass through. It determines whether edge rays are clipped, which directly affects edge brightness and the actual usable field of view.
What Is “Usable Field of View”: Turning the “Specified FOV” into Something You Can Actually See and Hold Steady
From an engineering perspective, usable field of view can be divided into two parts:
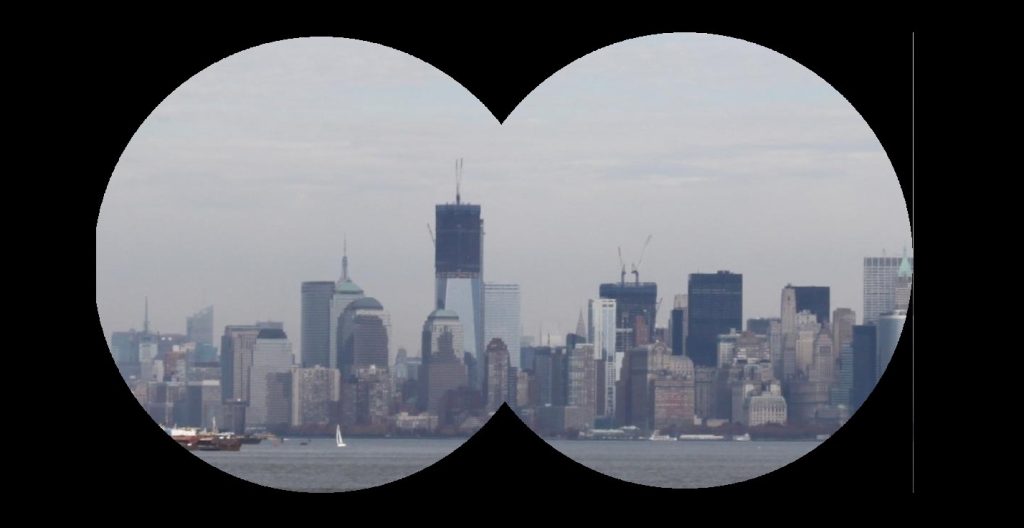
- Geometric accessibility: Within a reasonable range of eye movement (left/right, up/down, forward/back), the viewer can still see the entire field of view without obvious vignetting (dark edges) or blackouts (kidney bean effect).
- Photometric usability: The edge illumination of the field is not heavily cut off. Otherwise, vignetting or dark edges can make users feel that there is little information at the edges or that the image seems to shrink inward.
This means that simply increasing TFOV does not always improve the viewing experience. In fact, it can sometimes make the system more sensitive to eye position. A larger TFOV usually requires a larger eyepiece image angle, which increases exit pupil sensitivity. As a result, the tolerances for eye relief, exit pupil, and clear optical aperture become much tighter.
Exit Pupil × Eye Relief: What Determines the Eye Box and Sensitivity to Blackouts
You can think of the exit pupil as the cross-section of the light beam that your eye must align with. The larger the exit pupil, the more forgiving the eye box is. The smaller the exit pupil, the more sensitive the system becomes to small errors in eye position.

However, a larger exit pupil does not automatically mean the binocular is easier to use. Eye relief determines how far the exit pupil sits from the eyepiece:
- Longer eye relief: Users wearing glasses or masks can more easily reach the exit pupil position. However, the system may become more sensitive to front-back distance changes, especially in large-AFOV designs.
- Shorter eye relief: It may work fine for users without glasses, but glasses wearers often cannot see the full edge of the field, resulting in a “shrunk” field of view.
Practical experience: When users complain about blackouts or say the image goes dark with slight movement (often described as the kidney bean effect), the problem is usually not related to resolution. Instead, it is often caused by an eye box that is too narrow or by eye relief / eyecup settings that do not match the user, making it difficult for the eye to stay stably aligned with the exit pupil.
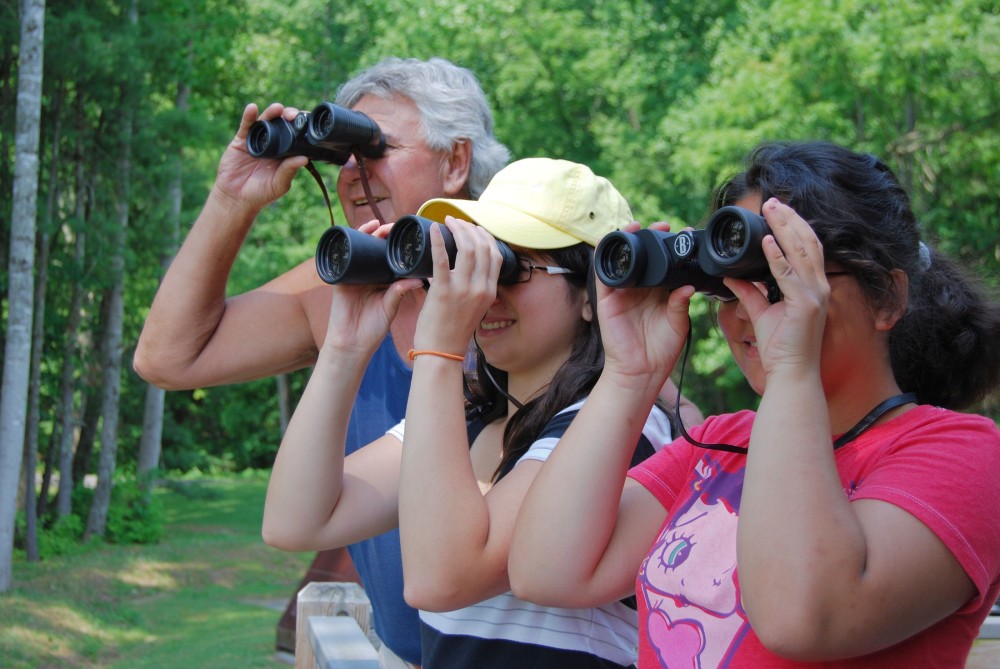
Eyeglass Compatibility: What Really Matters Is “Effective Eye Relief,” Not the Stated Eye Relief
A specification sheet may list 17 mm of eye relief, but that does not necessarily mean glasses wearers can see the full field of view. This is because the actual distance between the user’s eye and the eyepiece is increased by three factors: eyecup height, thickness of the glasses lenses or frame, and personal wearing habits (the distance between the lenses and the eye).
A more engineering-oriented way to express:
Effective Eye Relief (Effective ER) ≈ Stated Eye Relief − Residual Eyecup Height − Eye-to-Glasses Distance
So even if two products both list 17 mm eye relief, the real experience can differ. A product with fully retractable eyecups and a thinner eyepiece housing may be more comfortable for glasses wearers than one with limited eyecup retraction or a thicker outer eyepiece ring.
Target Range for Glasses Wearers (Useful for Selection / Acceptance Criteria)
- Preferred target: Effective eye relief ≥ 15–16 mm (measured with the eyecup fully retracted). For larger AFOV or wider TFOV, it is recommended to raise the target to 17–18 mm.
- Eyecup mechanism: At least 2–3 adjustable positions, ensuring that the retracted hard edge does not press against the lenses (to avoid scratches and unstable eye positioning).
- Eyeglass compatibility check: When looking to the full edge of the field with glasses, slight head movements should not frequently cause blackouts, and any difference between left and right eyes should be minimal.
Prism Aperture: Why Increasing the Field of View Will Make the Edges Darker or Narrower
In binoculars, the edge rays of the field of view travel at steeper angles through the prism and eyepiece. If any part of the optical path has a “limited effective aperture” (prism clear aperture, baffle tube, front group of the eyepiece, etc.), these edge rays get clipped first, resulting in:
- Reduced edge illumination (vignetting): Landscapes may still look fine, but for birdwatching or concert stages, the edges noticeably lose brightness.
- Prematurely “cropped” field edges: Users feel that the TFOV is smaller than stated, or that the outer edges appear empty.
- Worse with slight eye misalignment: Steeper rays are closer to the aperture boundary, narrowing the eye box and making blackouts more likely.
This also explains why two binoculars at the same price can feel different: both may have a sharp center, but one has dark edges while the other’s edges remain bright.
The difference comes down to optical design and aperture budgeting in one case, versus manufacturing tolerances and baffle/eyepiece assembly eating into the aperture budget in the other.
TTFOV Is Just “Area,” AFOV Shows the “Sense of Openness”: Don’t Mix the Two
When comparing binoculars of the same magnification, TFOV / linear field of view is the more direct metric.
When comparing different magnifications, AFOV (or at least TFOV × magnification as an approximation) better explains the subjective feeling of openness or immersion.
However, the larger the AFOV, the more sensitive the eye box becomes to eye relief errors, making it more demanding for glasses wearers.

Also, don’t overlook the limits of human visual field: even if a binocular provides a larger AFOV, users must still stay within an acceptable eye position range to truly enjoy it.
Turning “Usable Field of View” into a Practical Selection Framework (Directly Useful for Procurement and Product Planning)
It is helpful to upgrade a spec sheet from single metrics to combined constraints.
For the $50–$300 price range, a more practical approach is: first lock in magnification and objective size, then use three sets of thresholds to filter out options that are hard to see fully or difficult to hold steady.
A. First Define Your “Usage Posture”
- Birdwatching / tracking moving targets: Prioritize easy eye alignment and stable eye position (larger exit pupil and more forgiving eye relief). Extreme wide FOV should come second.
- Travel / everyday carry: Size and weight as well as quick target acquisition matter more. If a small objective is required (such as 8×25), you should accept a narrower eye box and compensate with better eyecup design and sufficient eye relief.
- Concerts / sports events: Users are more sensitive to edge brightness and blackouts due to frequent eye movement. It is best to avoid designs that only pursue large AFOV but lack sufficient effective eye relief.
B. Three Thresholds: Determining Whether You Can See the Full View and Keep It Stable
| Metric Group | What You Should Check | Suggested Thresholds (Rule of Thumb) | Typical Complaints if Not Met |
| Eye Position Threshold (Eye Relief × Eyecup) | Whether glasses wearers can see the full edge; whether blackouts occur easily | Effective eye relief ≥ 15–16 mm; eyecups should fully retract and have multiple positions | “Can’t see the full field,” “goes dark with slight movement,” “have to press it against my face” |
| Tolerance Threshold (Exit Pupil) | Tolerance to horizontal/vertical eye shift; low-light usability | Exit pupil (D_exit): ≥ 3 mm for daytime; ≥ 4 mm for general use; larger for greater stability | “Very sensitive to eye position,” “slow to find the image,” “looks gray in low light” |
| Edge Usability Threshold (Clear Optical Aperture) | Edge illumination and the actual usable field of view | Prism and baffle path should not clip edge rays; edge illumination drop should be controlled | “Dark outer ring,” “feels like the view shrinks,” “no detail at the edges” |
C. A Simple, Practical “Usable Field of View” Verification Process (Suitable for prototype reviews or incoming quality inspection)
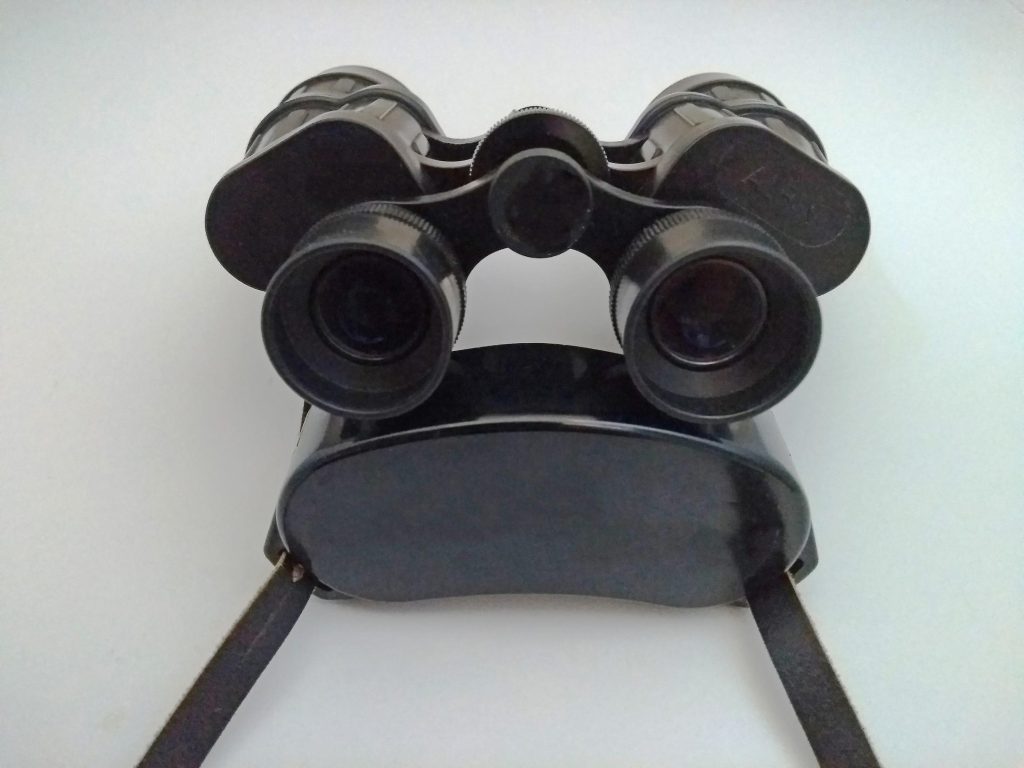
- Step 1: Eye Relief / Eyecup Measurement
Use a fixture to measure the stated eye relief, and at the same time record the residual height of the eyecup when fully retracted. This allows you to determine the effective eye relief.
- Step 2: Exit Pupil and Eye Box
Capture images of the exit pupil behind the eyepiece (both centered and slightly off-axis positions). Check whether the exit pupil shows clear clipping or shape distortion.
- Step 3: Edge Illumination and Vignetting
Take photos through the binocular (a simple smartphone mount works). Compare edge brightness and check whether vignetting or premature edge blocking appears.
- Step 4: Glasses-Wearing Scenario Verification
Have at least three users with different face shapes (including glasses) perform quick viewing and scanning tests. Record the frequency of blackouts and edge visibility.
Why the Experience Can Differ So Much at the Same Magnification: Three Typical Combination Cases
The following examples explain common subjective differences caused by different parameter combinations at the same magnification. You can treat them as a reference checklist when reviewing prototype samples.
Case 1: Very Large TFOV, but Glasses Wearers Can’t See the Full Field
- Symptom: The spec lists 7.8° / 136 m @ 1000 m, but glasses wearers only see a smaller “shrunk” circle of the view.
- Root cause: The stated eye relief is acceptable, but insufficient eyecup retraction + a thick outer eyepiece ring reduce the effective eye relief to < 14–15 mm.
- Solution: Optimize the eyecup travel and eyepiece housing shape, or slightly reduce AFOV at the same TFOV (using a more moderate eyepiece design) to achieve a more forgiving eye box.
Case 2: Small Exit Pupil + Large AFOV → Frequent Blackouts
- Symptom: Even without glasses, the image goes dark with slight movement, and the outer field appears and disappears when scanning.
- Root cause: A small exit pupil narrows the eye box, while a large AFOV increases eye-position sensitivity. If minor aperture clipping also exists in the optical path, the effect becomes even more noticeable.
- Solution: At the same magnification, increase the exit pupil (by using a larger objective or lower magnification), or reduce AFOV. Also check whether the prism or baffle path is limiting the optical aperture.
Case 3: Noticeably Dark Edges, Making the Field Look “Shrunk”
- Symptom: The center sharpness is good, but edge brightness drops quickly, making users feel that “there’s nothing in the outer ring.”
- Root cause: The prism clear aperture budget is insufficient, or manufacturing/assembly tolerances and baffles consume the aperture margin, causing edge rays to be clipped.
- Solution: During the design phase, perform a clear-aperture budget analysis (including assembly tolerances), and include edge illumination / vignetting checks in mass-production quality inspection.
At last: Use a Simple Checklist to Explain “Different Experiences at the Same Magnification”
When users say, “Both are 8×, but this one looks better / feels more comfortable,” start troubleshooting in the following order instead of focusing on resolution first:
- Check effective eye relief first: Can glasses wearers actually reach the exit pupil position? Do the eyecups retract far enough?
- Then check the exit pupil: Is the eye box forgiving enough? Are blackouts common when scanning?
- Next check the clear optical aperture: Are the edge rays clipped by the prism or baffles? Does edge illumination drop too quickly?
- Only then look at the stated TFOV / AFOV: Before making the field of view larger, make sure users can actually use it.
Frequently Asked Questions (FAQ)
Q1: Is longer eye relief always better?
A: No. If the eye relief is very long while the eyepiece design / AFOV is aggressive, the system may become more sensitive to front-back distance, making blackouts more likely. The key is that both effective eye relief and eye box tolerance meet the requirements.
Q2: Does a larger exit pupil always mean a brighter image?
A: The exit pupil determines how much light can enter your eye. However, in daytime conditions, the human pupil may only be 2–3 mm, so an excessively large exit pupil will not make the image brighter. Instead, it mainly improves eye-position tolerance and low-light usability at dusk.
Q3: Prism aperture usually isn’t listed in specifications—how can you judge it?
A: An indirect way is to look at edge illumination (vignetting) and the shape of the exit pupil. If the exit pupil becomes clearly clipped when viewed off-center, or the edges darken suddenly, it often indicates that the clear-aperture budget in the optical path is insufficient. For B2B acceptance testing, it is recommended to include edge illumination as a test item.
Q4: How should glasses wearers quickly adjust the eyecups?
A: Fully retract the eyecups and start from the position where you can see the full edge of the field. If blackouts appear, extend the eyecups one click slightly outward so the eyes can rest more stably on the exit pupil. Different face shapes may require different eyecup positions.